Koppelingsworm fs1 ombouwen naar een rd worm.
Geplaatst: 23 nov 2010, 20:18
Van het engelse forum geleend:
I've finally got round to finishing the clutch worm repair that I started a thread about some time ago. The pictures were lost on the old thread during the site facelift, so I thought I'd start from the begining in case the repair method is useful to someone else.
The clutch mechanism worked on my DX, but when I checked it, the worm threads in the case were almost worn away and failure was going to happen soon. I asked on here and searched on the internet for a solution and initially the only way forward seemed to be to source another side case. Then I spotted that the RD50 and FS1E clutch mechanisms were very similar, but the RD50 looked a better design as both parts of the worm mechanism can be replaced.
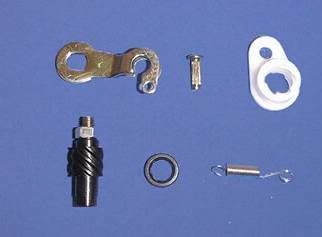
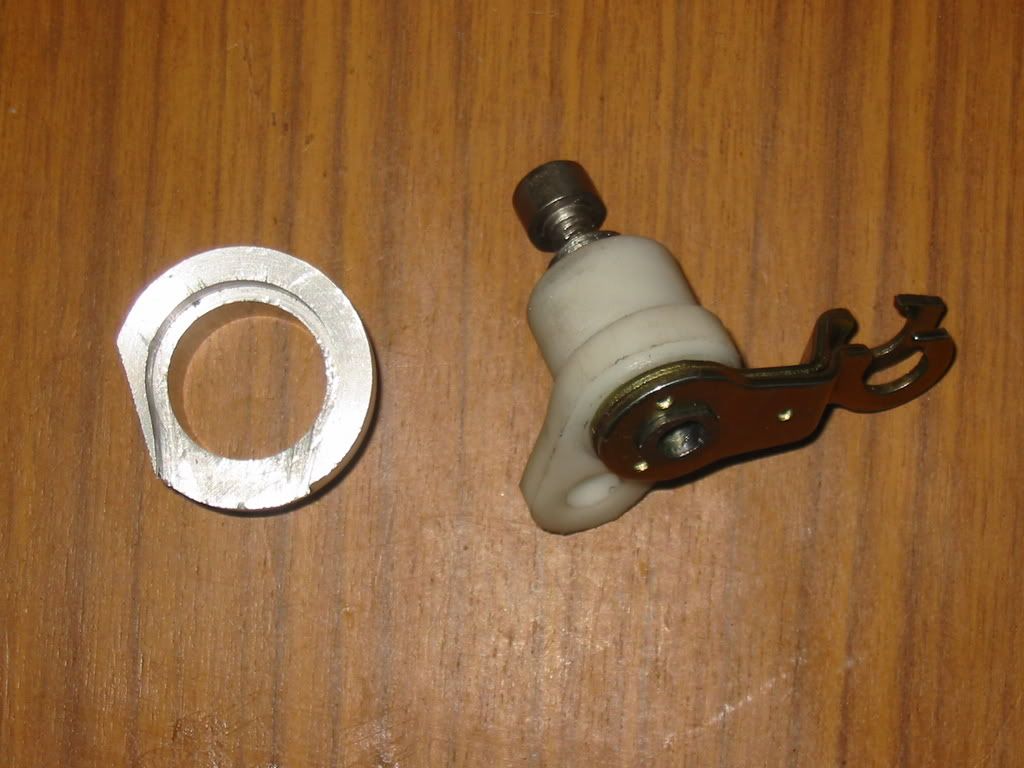
FS1E parts.

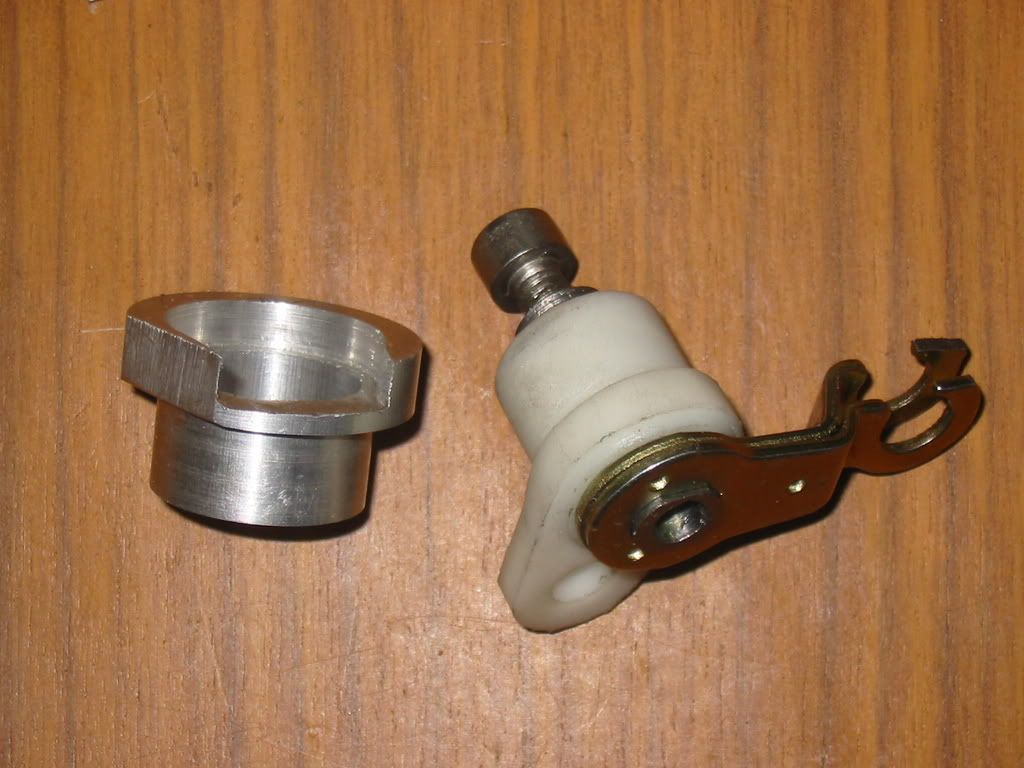
RD50 Parts
I decided to try and fit the RD50 parts to my FS1E side case, so I ordered a pattern set and tried a few things out. I won't go into all the trials and errors, thats all in the original thread. I'll just list here what you need to do to make it work.
Step 1 Order an RD50 clutch worm set.
You can get a pattern set for a few pounds as I did first time round, but genuine isn't much more and the worm thread quality is better. The parts you need are:
rd50 worm housing353-16396-00
rd50 worm screw241-16341-01
rd50 arm 451-16342-00
rd50 seal 93104-11028
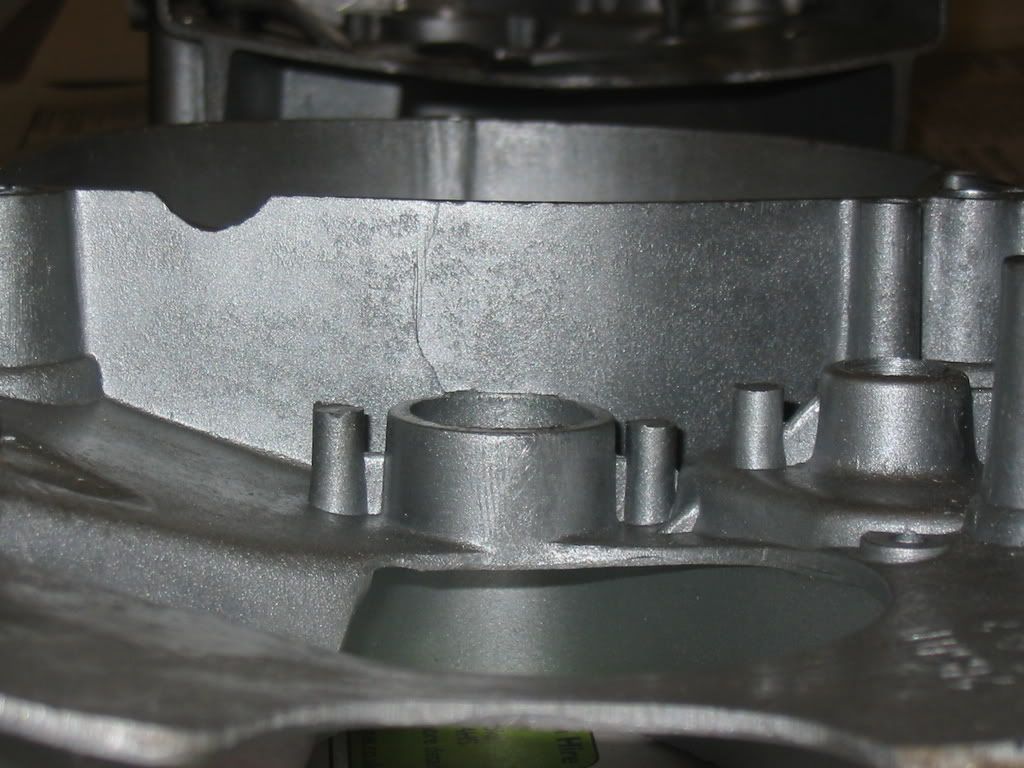
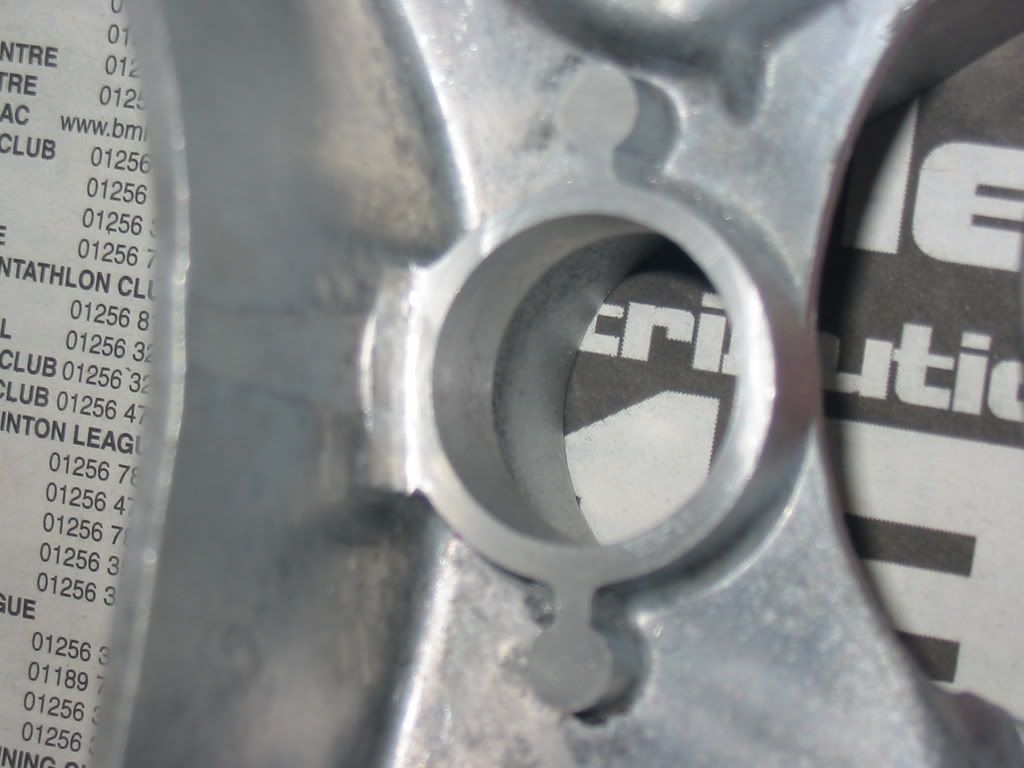
Step 2 Get the side case machined.
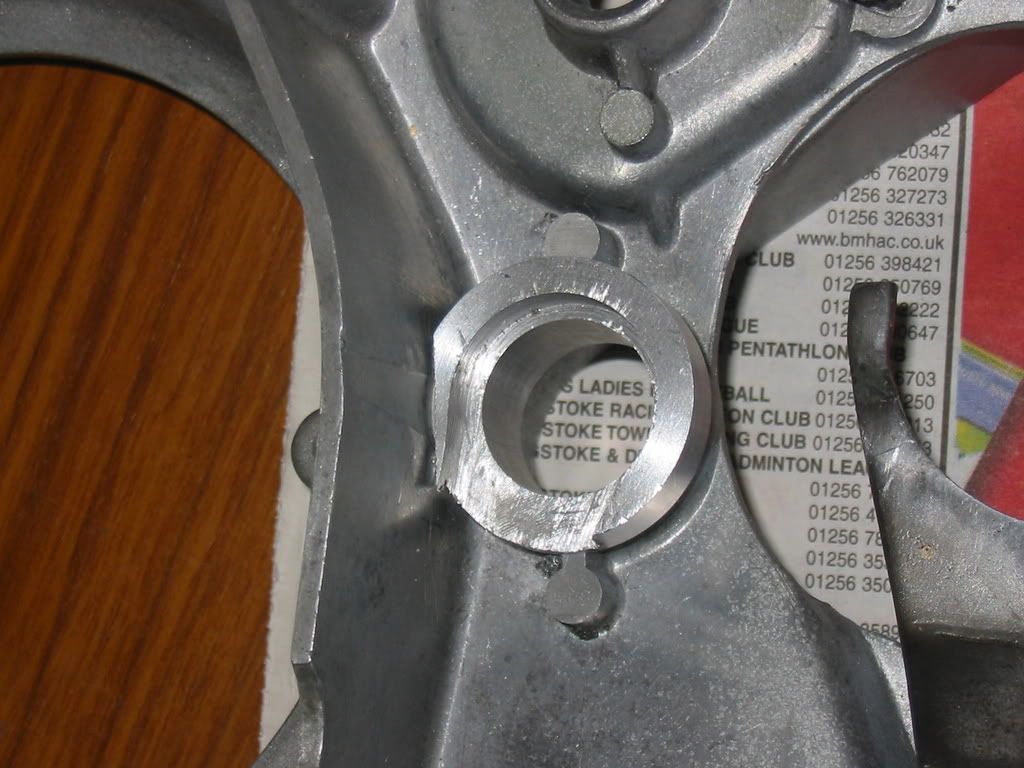
All remains of the old worm thread have to be removed by boring out to a diameter of about 22.4mm. It is also necessary to machine back the cylindrical bit and the 2 casting thingys that stick out by removing 6mm. You should end up with a cylindrical bore about 10mm long. The first 2 pictures show a new case, as I don't have any pics of the worn one before machining. The next 2 pictures are post machining.

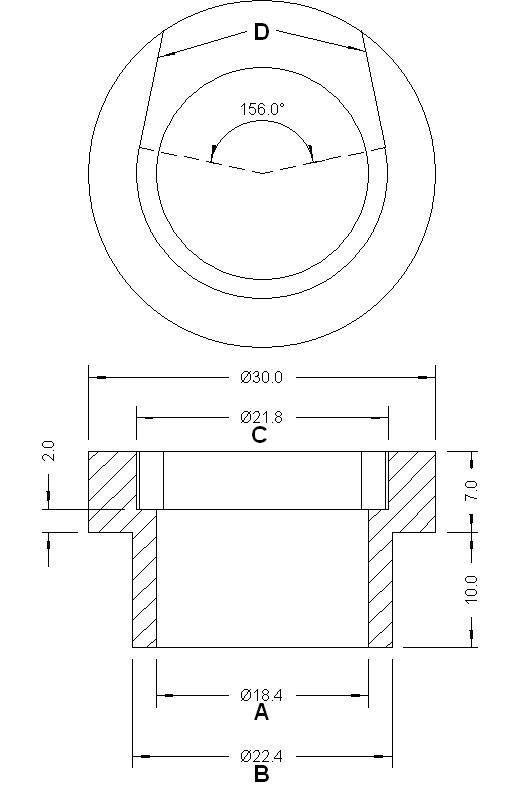
Step 3. Get a bush made.
An aluminium alloy bush needs to be made to mate the RD50 plastic worm housing to the Fizzy side case. See sketch below. However some of the dimensions are only as a guide. You will need to measure your machined case and your worm housing to get them correct. In the sketch, dimension A needs to be a tight fit on the worm housing. Dimension B needs to be a sliding fit in the side case. Dimension C and cut lines D need to be a clearance fit on the worm housing. All other dimensions can be as written
Step 4 File a flat on the bush.
A flat has to be filed on one side of the bush to match the casing next to the generator. This has the advantage in that it prevents the bush rotating. The way the worm housing sits in the bush then stops stops the worm housing from rotating as well.
Exactly where you file the flat is important though. With the worm mechanism assembled the arm should be at 90 degrees to the cable. I did notice that there was a difference between the best position for the pattern and genuine RD50 parts.
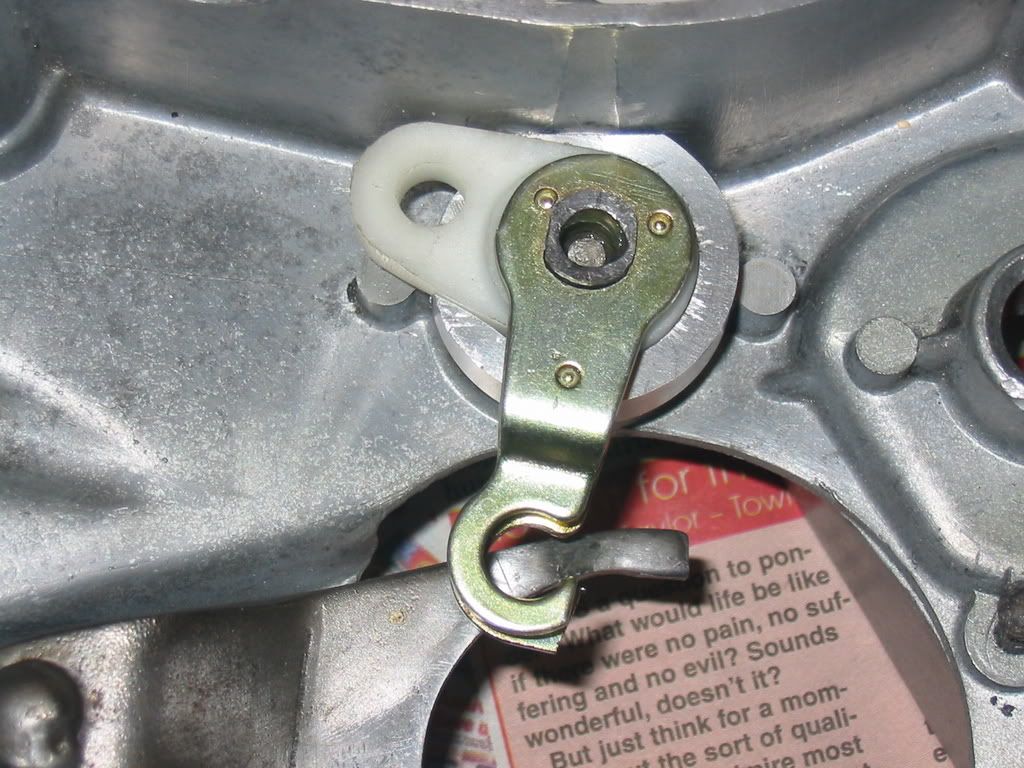
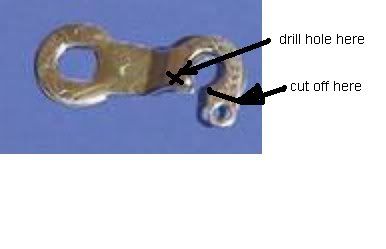
Step 5 Modify the RD50 Clutch arm
The bit the spring is designed to attach to is different from the Fizzy arm and catches on the output shaft, so it needs to be cut off. Then a small hole needs to be drilled to attach the spring like the Fizzy arm.
Step 6 Fit it all together and try it.
At this stage it should all hold together well enough to test on the bike. The RD50 worm has a larger pitch than the Fizzy one. This means that the clutch plates move further apart for a given lever movement and the clutch will feel heavier. I was concerned that the springs would become coil bound, so I initially tried it with the clutch cover removed, but that didn't seem to cause a problem and with a well oiled cable the clutch wasn't noticably heavy.
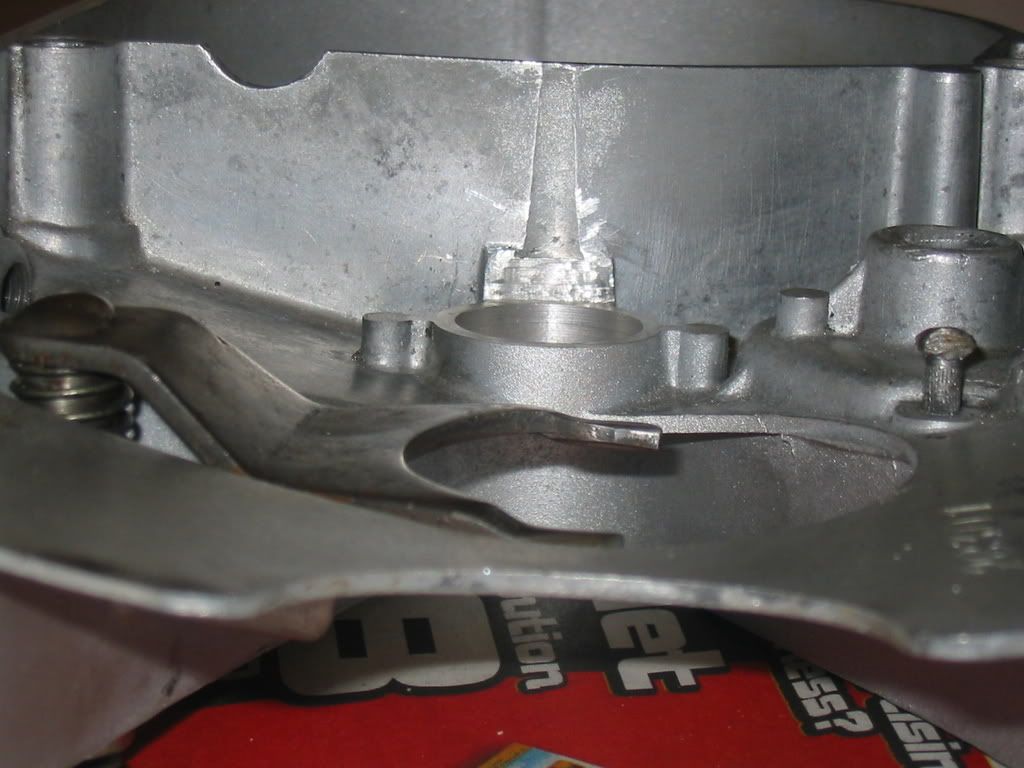
Step 7 Glue the bush in place.
I used loctite 638 retainer. 601 would probably be just as good. Araldite or superglue would probably be adequate. If it was made a tight fit, it may be ok with no glue at all. I machined the bush so that the plastic worm housing was a fairly tight fit and can only just be pushed in by hand.
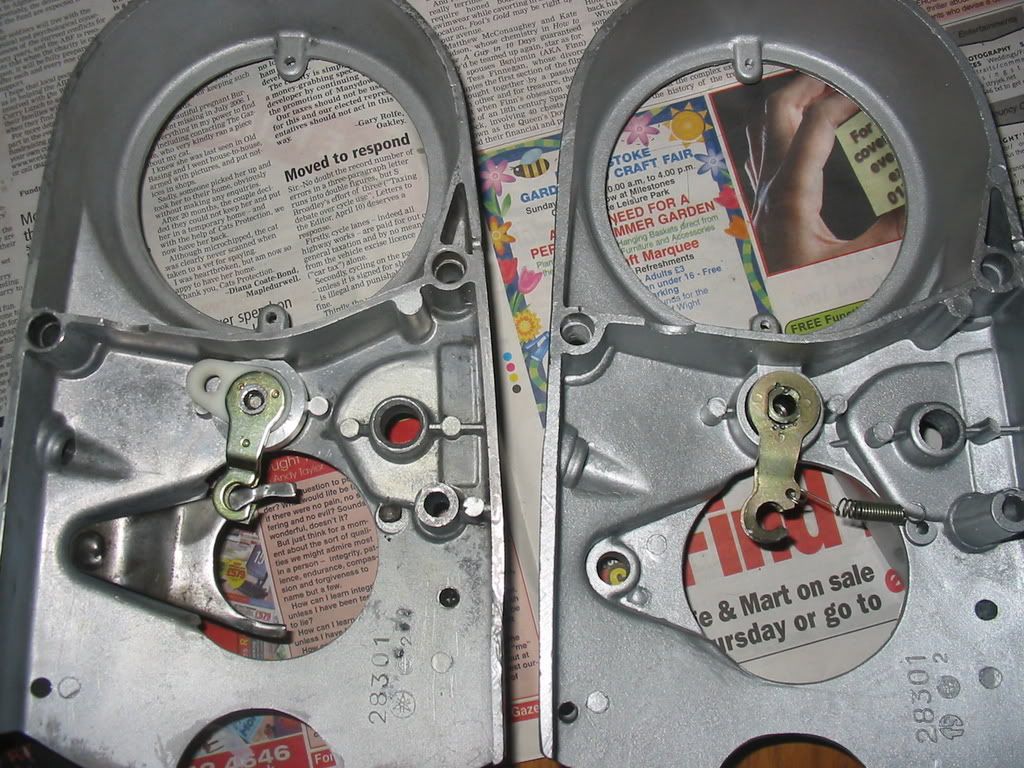
The picture shows the modified casing next to a new pattern case fitted with a standard fizzy arm. This was before I drilled the small hole to fit the return spring. If anyone else has a go please let me know how you get on. Especially with any improvements I'm sure there will be some better ways.
Cheers
Mark C
I've finally got round to finishing the clutch worm repair that I started a thread about some time ago. The pictures were lost on the old thread during the site facelift, so I thought I'd start from the begining in case the repair method is useful to someone else.
The clutch mechanism worked on my DX, but when I checked it, the worm threads in the case were almost worn away and failure was going to happen soon. I asked on here and searched on the internet for a solution and initially the only way forward seemed to be to source another side case. Then I spotted that the RD50 and FS1E clutch mechanisms were very similar, but the RD50 looked a better design as both parts of the worm mechanism can be replaced.
FS1E parts.
RD50 Parts
I decided to try and fit the RD50 parts to my FS1E side case, so I ordered a pattern set and tried a few things out. I won't go into all the trials and errors, thats all in the original thread. I'll just list here what you need to do to make it work.
Step 1 Order an RD50 clutch worm set.
You can get a pattern set for a few pounds as I did first time round, but genuine isn't much more and the worm thread quality is better. The parts you need are:
rd50 worm housing353-16396-00
rd50 worm screw241-16341-01
rd50 arm 451-16342-00
rd50 seal 93104-11028
Step 2 Get the side case machined.
All remains of the old worm thread have to be removed by boring out to a diameter of about 22.4mm. It is also necessary to machine back the cylindrical bit and the 2 casting thingys that stick out by removing 6mm. You should end up with a cylindrical bore about 10mm long. The first 2 pictures show a new case, as I don't have any pics of the worn one before machining. The next 2 pictures are post machining.
Step 3. Get a bush made.
An aluminium alloy bush needs to be made to mate the RD50 plastic worm housing to the Fizzy side case. See sketch below. However some of the dimensions are only as a guide. You will need to measure your machined case and your worm housing to get them correct. In the sketch, dimension A needs to be a tight fit on the worm housing. Dimension B needs to be a sliding fit in the side case. Dimension C and cut lines D need to be a clearance fit on the worm housing. All other dimensions can be as written
Step 4 File a flat on the bush.
A flat has to be filed on one side of the bush to match the casing next to the generator. This has the advantage in that it prevents the bush rotating. The way the worm housing sits in the bush then stops stops the worm housing from rotating as well.
Exactly where you file the flat is important though. With the worm mechanism assembled the arm should be at 90 degrees to the cable. I did notice that there was a difference between the best position for the pattern and genuine RD50 parts.
Step 5 Modify the RD50 Clutch arm
The bit the spring is designed to attach to is different from the Fizzy arm and catches on the output shaft, so it needs to be cut off. Then a small hole needs to be drilled to attach the spring like the Fizzy arm.
Step 6 Fit it all together and try it.
At this stage it should all hold together well enough to test on the bike. The RD50 worm has a larger pitch than the Fizzy one. This means that the clutch plates move further apart for a given lever movement and the clutch will feel heavier. I was concerned that the springs would become coil bound, so I initially tried it with the clutch cover removed, but that didn't seem to cause a problem and with a well oiled cable the clutch wasn't noticably heavy.
Step 7 Glue the bush in place.
I used loctite 638 retainer. 601 would probably be just as good. Araldite or superglue would probably be adequate. If it was made a tight fit, it may be ok with no glue at all. I machined the bush so that the plastic worm housing was a fairly tight fit and can only just be pushed in by hand.
The picture shows the modified casing next to a new pattern case fitted with a standard fizzy arm. This was before I drilled the small hole to fit the return spring. If anyone else has a go please let me know how you get on. Especially with any improvements I'm sure there will be some better ways.
Cheers
Mark C


